You can use cPanel login details to access your Web Disk. You can also create an additional account for accessing a specific directory on your account so that it can be useful for security purposes.
1. Log into your cPanel account. (eg: www.example.com/cPanel )
2. In the "Files" section, click the "Web Disk" icon.
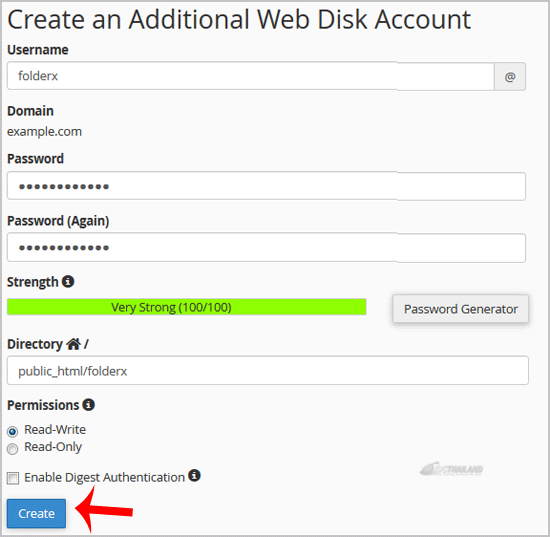
3. Under "Create an Additional Web Disk Account", enter the details of the new account you wish to create.
Username: folderx
Password: Enter your new password or click the Password Generator button to generate a random password.
Directory: You can leave it blank but it will grant access to the entire directory. If you wish to allow access to only a specific folder, enter the folder location, such as public_html/folderx (the user will only able to access /folderx).
Permissions: Select your option.

Note: If you are using the Windows OS, you will need to mark €œEnable Digest Authentication€. However, if the server has an SSL certificate signed by a recognized certificate authority and you are able to make an SSL connection over port 2078, you do not need to enable this.
4. Now click on the €œCreate€ button and your new additional account will be created. You can use your new login details to access your Web Disk.

